1966 Suburban Chassis Swap – The Build – Part 2

1966 Suburban Chassis Swap – The Build – Part 2

Strip the Yukon body of seats and wiring harness

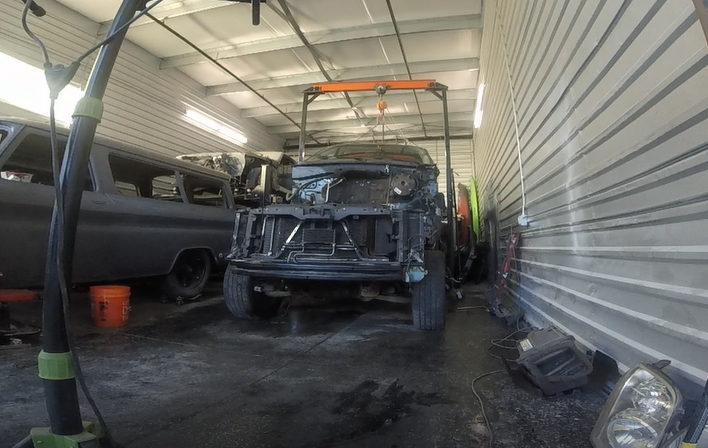
It was decided early on that we were going to use the front seats and the third row so as we were dismantling the Yukon we removed everything from the rear doors forward including the seats, all the wiring, the console and everything out of the dash that was needed for the new vehicle, The Yukon has a structural bar that is around 4 inches on the drivers side and 2 1/2 inches on the passenger side that holds most everything under its dash including the steering column, pedal assembly, wiring harness, most of the heater/cooling plumbing and numerous other items. The structural member was removed and fitted into the suburban.

Fab Body Mounts

Clean up the frame treat the inside paint the outside

I bought the donor Yukon on Copart and it was located in Oklahoma City, OK. I wondered at the time why it went so cheap for a 119000 mile hail damage car. After I picked it up it was pretty clear that there was a lot of corrosion on the frame, like hey I parked my Yukon in the ocean for a week. I had a number of options and considered having it dipped or blasted but those 2 processes seem more rare where I am than I ever expected. So, I pulled the body off, cut all the mounts off and pulled everything off that I could that wasn’t metal. I worked for a few weeks sanding and grinding the outside then priming and painting it with Eastwood ITEM # 11175 EXTREME CHASSIS BLACK BRAND then spent a few more days doing the same to the inside of the frame using the Eastwood Internal Frame Coating Aerosol Black. This was all some extremely dirty work and I am still working to get all the rusty dust out of my shop, note for next time, do it outside.

Replace the rear shocks and air pump

You know how you sometimes ask yourself, if I had this to do over again what would I change? This is one of those things. Not knowing this system and how complicated it is I noticed that the existing pump and the rear shocks were in pretty bad shape from corrosion so I decided to replace them. As I was doing the research I noticed there was a delete kit that replaced the rear shocks with coil-overs and added a resistance plug to the existing wiring. That is the route I should have gone. Let me explain why. This system is the Z55 Autoride Suspension option that uses the Electronic Suspension Control (ESC) system to make changes to each of the four shocks in milliseconds as you drive, adjusting the stiffness and handling of the suspension. This RPO also includes rear auto-levelling air shocks and a compressor, which can often be the failure point for these suspensions. The system is tied into the GMLAN bus and uses a number of sensors including a lateral sensor under the seats. The GMLAN bus system as I described in the kickoff to this series is a serial system that requires all the components to be plugged in for it to work. My first mistake was removing the OnStar system without knowing it was going to break GMLAN. I overcame this by jumpering the tan/tan-black wires at the intermediate relay panel. I also moved the lateral sensor while I was moving the seats. Ultimately to make a long story short, I will probably bite the bullet and remove this system all together and try to recover some of my costs by selling the shocks and pump on Marketplace.

Mount the body

Fab the firewall

Mount the front crossmember, Seats and wiring harness

1966 Suburban Chassis Swap – The Build – Part 1

If you’re a fan of classic cars, then you’re going to love this 1966 Chevrolet Suburban build. This vehicle has been rebuilt from the ground up, and features all sorts of awesome modifications that will make it stand out from the crowd. Whether you’re looking for a show car or simply want something unique and stylish, this suburban is definitely worth checking out. So without further ado, let’s take a closer look at this amazing build!

Decide what needs to be removed from the Yukon to facilitate the electronics in the build

Ultimately we want the electronics you would expect like the lights and switches that control the, the automatic levelling system (we may opt out of this later) , the ABS system and traction control as well as the cruise control system. In order to get all of these systems functioning in the new vehicle we need not only the wiring but the engine controller and the body computer. What we didn’t know when were dismantling the Yukon was that the GMLAN system installed on this model is a serial system that needs to run through the ONSTAR system. In order to not install the ONSTAR system and all its wiring we found a workaround and jumpered across the bus at the intermediate relay panel (more on this later). Removing the ONSTAR system means that there are a few things that no longer work like the TPS system. We will continue to look for a solution for this issue as we move forward.

We also want to graft a small section of the firewall where the movable pedals mount as well as the brake booster and steering column cover. We chose to cut this part of the firewall out of the Denali and weld it into the Suburban.

Separate the bodies from the chassis

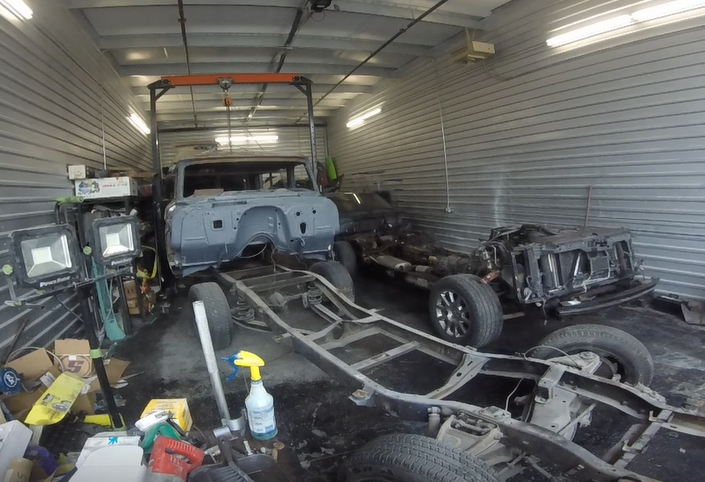
Removing the body from the Yukon turned out to be relatively simple, there is a good series you can watch for this process but long story short once you remove the hood and front fenders, there are 6 body mounts per side and a couple of main connection points to tackle. There is a YouTube video here

One of the problems we encountered was how to lift the bodies from the frames without doing damage to the body. We decided to lift the Suburban through the cabin windows but needed to do so without pinching body at the lift point or damaging the window frames while we were lifting. Our solution was to use a 2×3 piece of steel and weld stops on it at the windows frame.

We went in a slightly different direction with the Yukon, choosing to lift it from the rear wheel wells and under the front doors. We had previously purchased a 5 point lift cable with eyelets in order to do this. With both of these lifts we used the 2 ton gantry crane with the roller block and lift chain we purchased from Harbor freight some time back.

Test fit the suburban body on the Yukon chassis

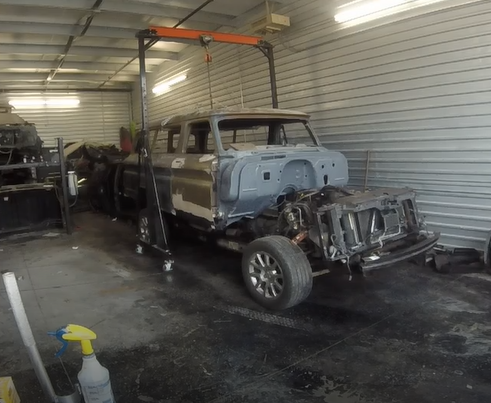
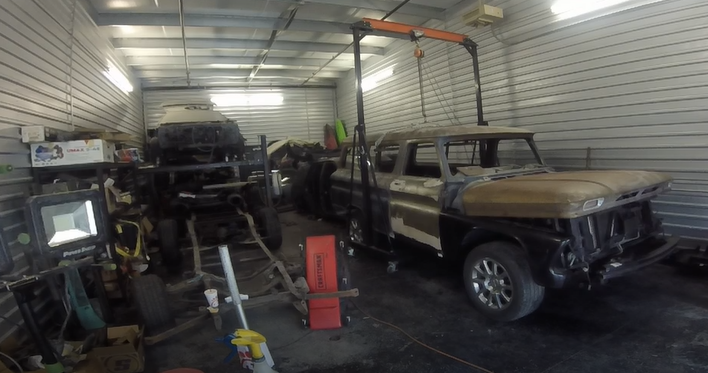
Once the Suburban body was set down on the Yukon chassis we went about the process of seeing what body mounts might work (none of them did), how the engine fit to the firewall and where we had space contention between old and new. There is a surprising amount of space under the body of the Suburban and there were only a few areas where we had to make modification specifically we had to remove some material at the back of the rear wheel wells and just a little material from the passenger side firewall where it was hitting the engine.

Test fitting the front fenders and the hood revealed a number of areas where some modifications needed to be made. As you can see from the picture the hood was up and the fenders were short compared to the Yukon. Interestingly I did find another build where the builder cut the body aft of the door and added 3 inches which I would have found to be a ton of work. What we did was much simpler. We moved the radiator and core support back 4 inches to make room for the fenders and hood. As we did that the hood found plenty of clearance and settled right into its space.

Read more about this build as I continue to ramble in the 1966 Suburban Chassis Swap – Part 2

Suburban Original

1966 Chevrolet Suburban Chassis Swap Origin Story

In December 2020 at the height of the Covid Pandemic shutdown we were talking about what project we might take on for the remainder of the winter. The son mentioned that he really liked the 1960-1966 Chevrolet C10 body style, specifically mentioning that he liked the way the turn signals in the hood looked. We started looking around on Craigslist and Facebook Marketplace for something that might be buildable in this first generation of C/K series trucks. We happened on a 1966 Suburban that was mostly just a body (no engine, transmission, wiring harness etc) so we went to take a look at it.

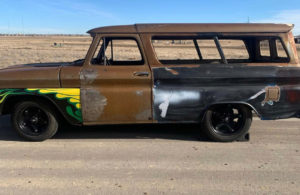
Suburban original before the chassis swap
1966 Suburban Original

What we found was what you will typically see in this age of vehicle located in the relatively dry climate of Colorado.  That is to say that the rockers from the A pillar to the B pillar were pretty rotten and because it had been outside for many years the top and the hips of the body had some hail damage.  The body was otherwise pretty straight and largely rust free and it had what I consider the better option in the rear with barn doors.  The previous owner had purchased a number of repair panels for the A pillar, the B pillar, the inner and outer rockers and the body mounts and included those in the sale.  He wasn’t willing to negotiate on price but luckily agreed to deliver to my shop.  We spent a couple of months working on repairing the A and B pillars, the floors and the rear lower body panels while constantly having a discussion about the direction of the project.  Early on we talked about creating a slammed on the ground Suburban going so far as to obtaining an airbag kit and some frame mod kits but at the end of the day lowering the Suburban, modifying the frame, adding disc brakes all around and doing an LS swap has been done many times.  Because of this and the cost of doing what needed to be done we decided to go in a different direction and re-body the Suburban onto a Yukon frame. You cant throw a dead cat without seeing something at a car show or cars and coffee that has an LS swap but what you rarely see and almost never see done well is a chassis swap.
 

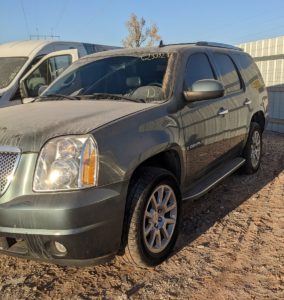
2007 yukon denali that will provide the chassis for the swap
Yukon Denali

After much research we decided this was a good match as the Suburban wheelbase is 115 inches and the Yukon wheelbase is 116 inches along with the fact that the Yukon with the Denali package comes with the 6.2 LS and the 6L80E transmission. 

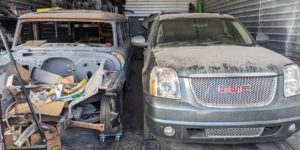
suburban and yukon side by side front comparison of length, width and wheel base
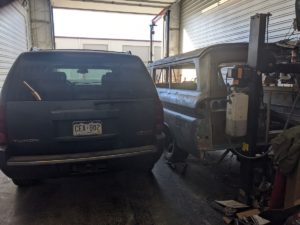
suburban and yukon side by side rear to compare deck height

As you can see from the pictures above the 2 vehicles are very similar. We are going to cover what steps we took to build the project in the 1966 Suburban chassis swap build post.

So the question will probably come up, why the Yukon and why the Denali specifically. We live in Colorado and we want to be able to drive this Suburban in any situation and in all seasons. We want to have some modern amenities like air conditioning, a decent heating system, 4 wheel drive, ABS and possibly even something like cruise control. In order to make that work we need to consider how to dismantle the Yukon in a way that allows us to retain as much of the root systems as we might need. We need to get the engine/transmission controller, the body computer the wiring harness from the front of the vehicle to the back doors as well as the steering column and the pedals.